DISCLAIMER: Let me preface this by saying I am NOT a medical professional and have zero authority regarding any medical recommendations. Everything I share below is relevant to my own personal experience. They are things I personally wish I’d known before my own knee surgeries (plural). Please do your own research and consult your doctors before implementing any of my forthcoming tips. I am not even linking items EXCEPT for the ONE I found most useful and most people don’t know about.
The type of surgery I had was an osteotomy, you can read about my first one and the re do here. But actually these tips are valid for any leg surgery or broken bone. Knees, ankles, etc. A friend of mine broke his ankle and had to have surgery just a few weeks after my initial surgery so we swapped a lot of stories. He is a physical therapist so the ice and magnetic therapy tips came from him.
Crutches

CRUTCHES First things first, you’ll need crutches, DUH. The ideal ones are elbow crutches as they provide much more stability than underarm ones. I know this may sound silly to some, but I strongly recommend practicing. I say this because I had to use crutches for a couple of months leading up to surgery since I had a torn meniscus.
Although I was able to set them down when necessary, and I didn’t reeeally have to keep weight off of the one leg, the practice was quite helpful during the mandatory use period. It definitely made hopping around on one foot post-op a lot easier.
Something else that helped me avoid accidentally putting weight on the affected leg was wearing only one shoe/slipper. Putting weight on it was a huge problem for me the first I had knee surgery. Something about only wearing one shoe signaled my brain to keep the leg up, idk.
One last thing regarding forearm crutches, you might want to consider wrist support if that is something you tend to have issues with.
R.I.C.E. + Magneto therapy
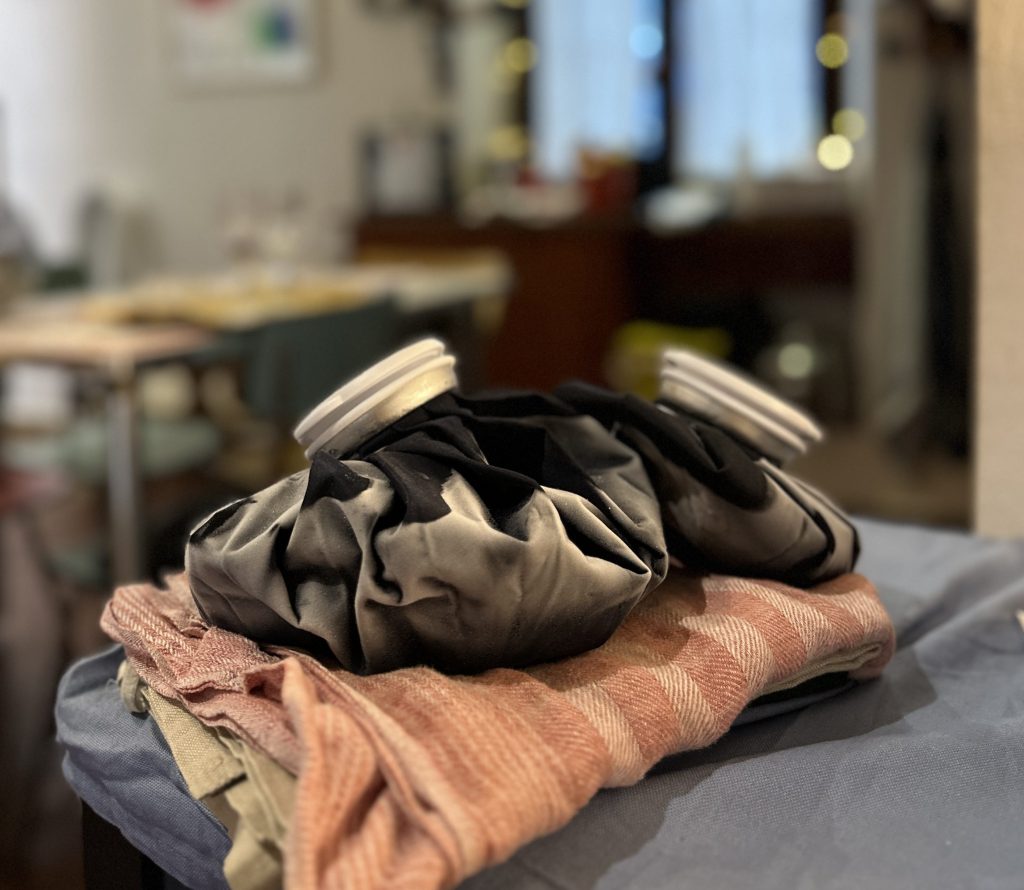
R.I.C.E. + MAGNET THERAPY Rest, Ice, Compression, Elevation. The mother of all acronyms for healing any sprain, broken bone, etc. Clearly rest is the absolute most important part of properly healing from broken bones, accidental or surgery imposed. After an osteotomy you are typically instructed to be on absolute bed rest for a whole month and to put zero weight on the affected leg for the entirety of that time. DO IT. If you’re like “pshhh, rest shmest” go read part one AND part two about how my surgery went wrong… largely in part to my own negligence.
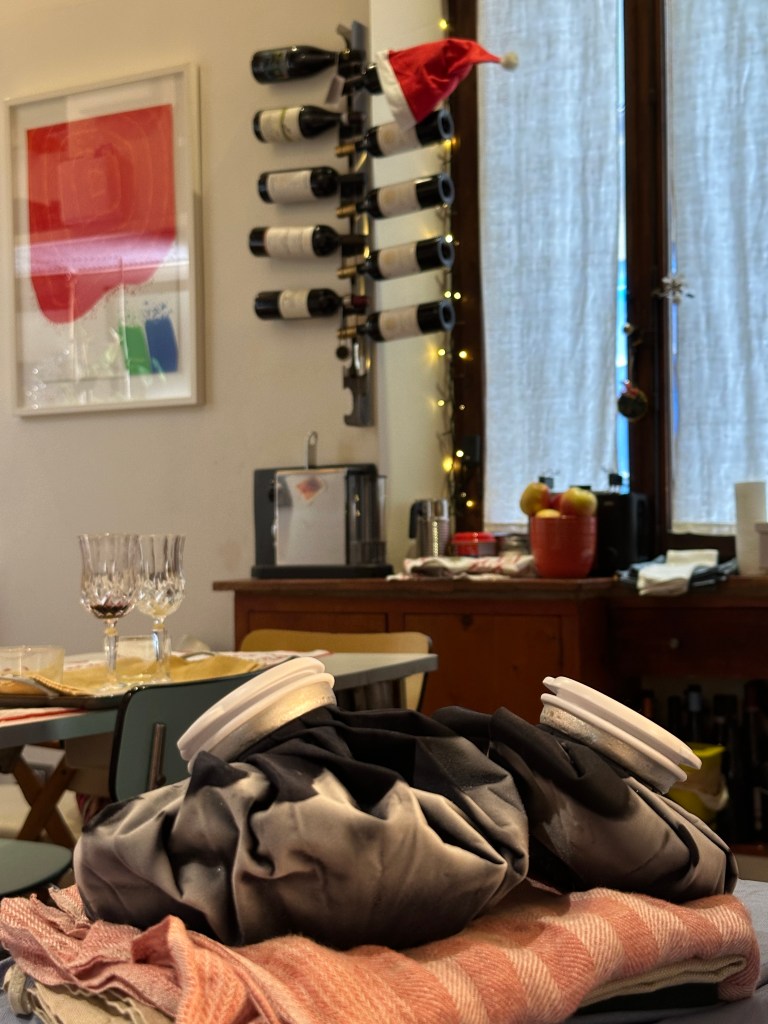
My doctors said to apply ice 3-4 times a day for 20min. Personally, I kept ice on several hours per day. But again, you check with your physician! I had originally purchased one of those gel wrap ice packs, but they only last a max of 45min or so. So instead I bought the bags (like the ones you saw on cartoons long ago haha).
orthopedic pillow
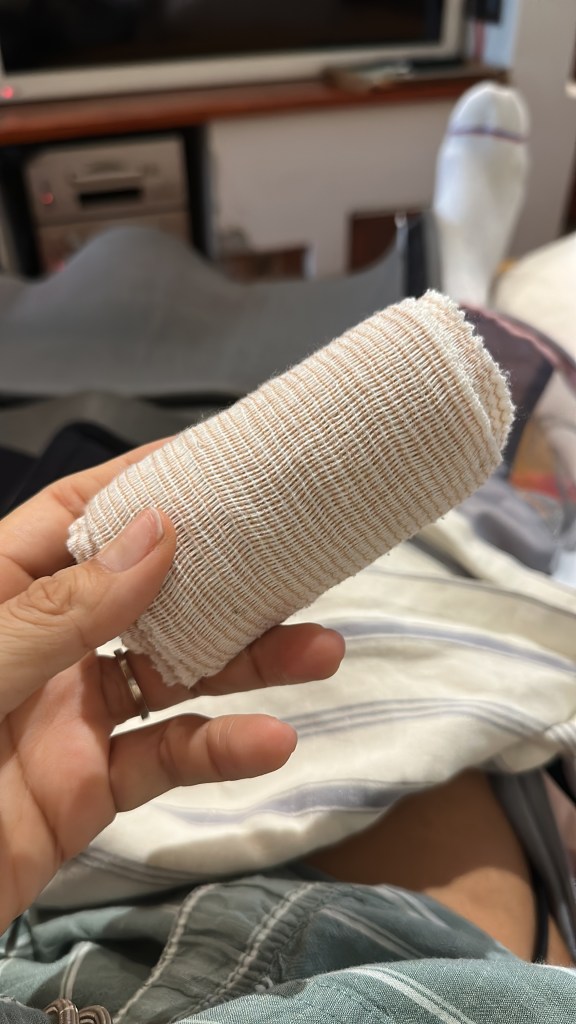
The compression bandages are pretty self-explanatory. Although I do recommend taking breaks from them since it will prevent that swelly, irritated feeling. Also be sure to regulate the tightness. Too tight has many negative results like numbness, increased swelling, bruising or even worse: tissue damage.
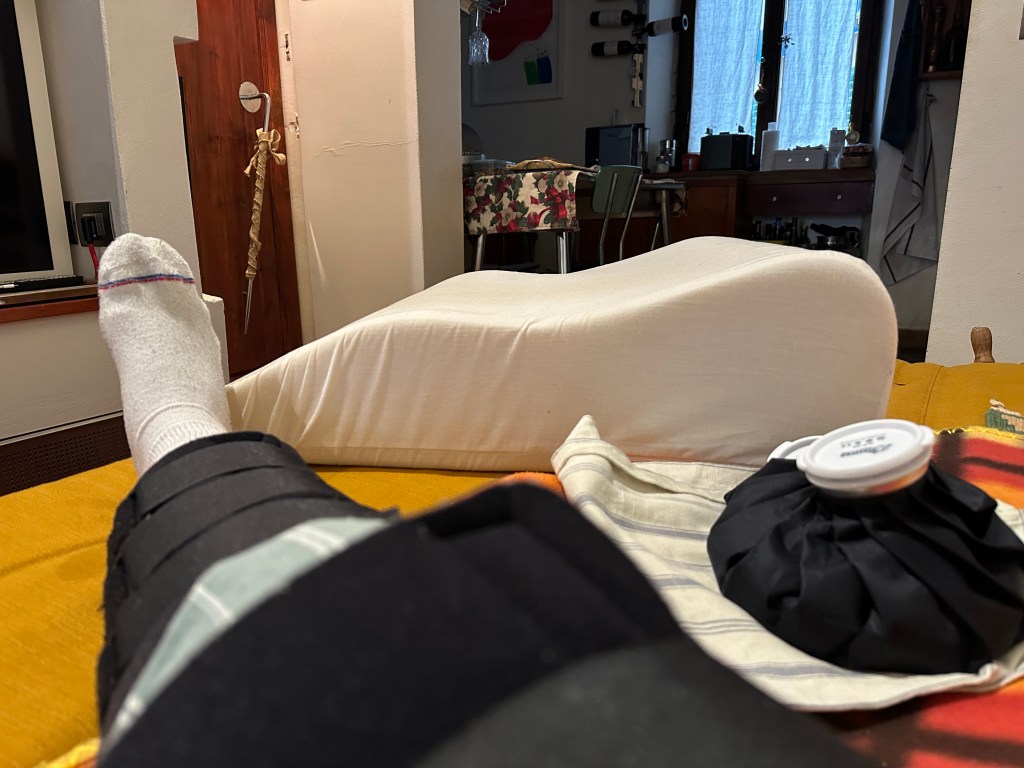
For elevation, you can use several pillows. But for maximum comfort, I highly recommend an orthopedic pillow specifically for post-op, not the small ones they sell for side sleepers, the larger triangle shaped ones (see above). If you have a surgery that requires you to bend and extend the leg, make sure you take breaks from the pillow as extension will be painful otherwise.
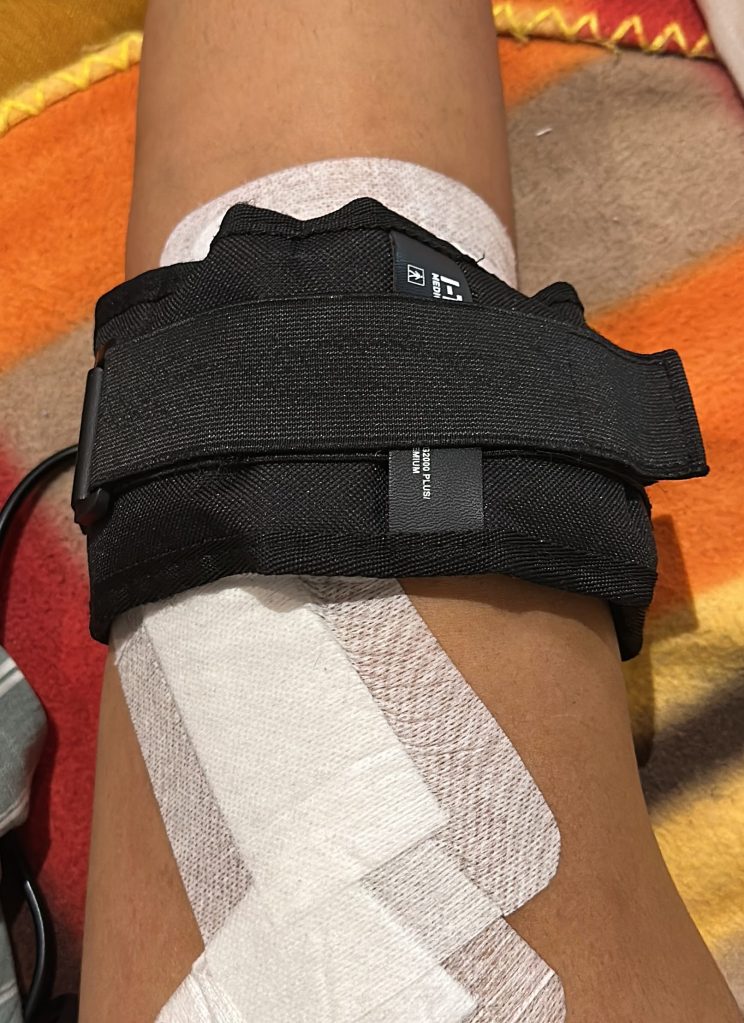
Though the effectiveness of magnetotherapy is mixed, certain devices are FDA approved to support bone reconstruction. My doctors and physical therapists recommended 6-8hrs per day. I break up this time into 2h sessions, which also ensures plenty of down time to apply ice packs for extended periods. Some people choose to sleep with the device on in order to fulfill the 6-8hrs in one go.
How do I shower?
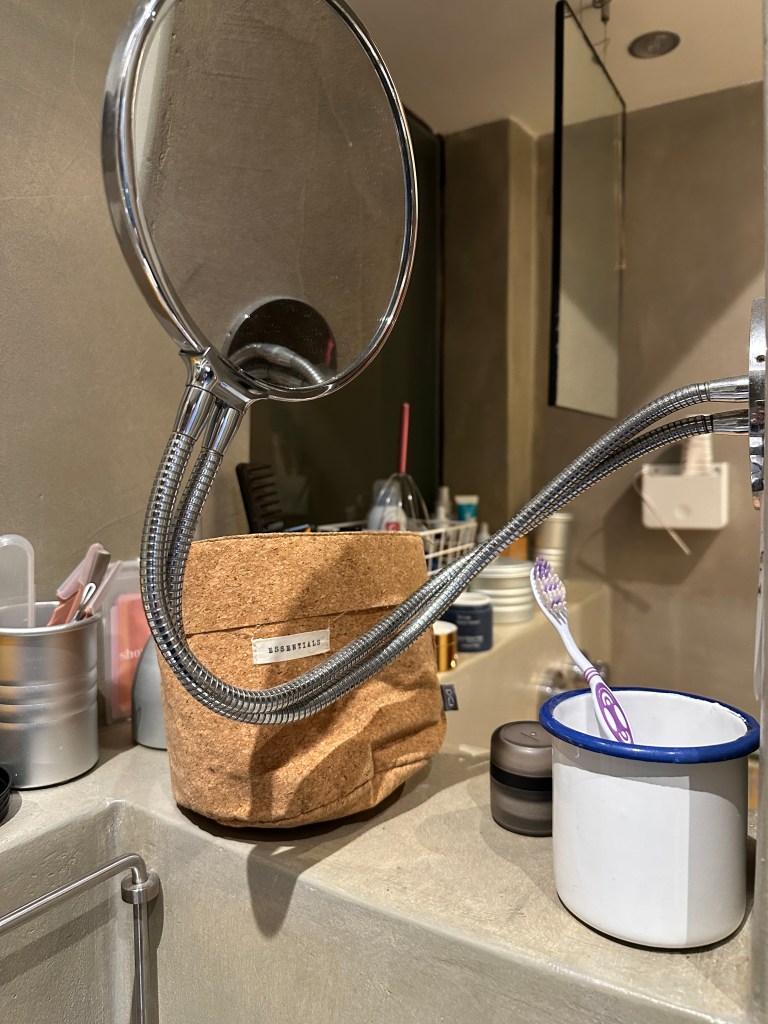
HYGIENE Sitting down as often as possible is key to proper healing. So creating a system to brush your teeth and wash your face is super helpful for proper rest. If your bathroom already has a chair or sitting area close enough to the sink, great! I keep all my day to day hygiene products within reach along with a mug (metal since I’m clumsy). If you can’t properly reach your faucet, the mug is useful to rinse your face, sip water for toothbrushing, etc. I keep a stool nearby, since I have a bidet. I sit on the stool and wash my face and brush my teeth over that (which is just a clean sink, people).
A bidet is also super helpful for washing your “pits & bits” (ew I don’t love that term lol) since showering is a whole ordeal. You just need to adapt to sitting backward (like a chair) since you can’t bend your knees as correct usage requires. BY the way, for anyone who thinks bidets are gross… you still wipe with toilet paper or wipes BEFORE washing yourself, just as you would in the shower. So take your smelly ass (literally) outta here with that misplaced judgement! I bet my undies smell cleaner than yours ha ha ha.
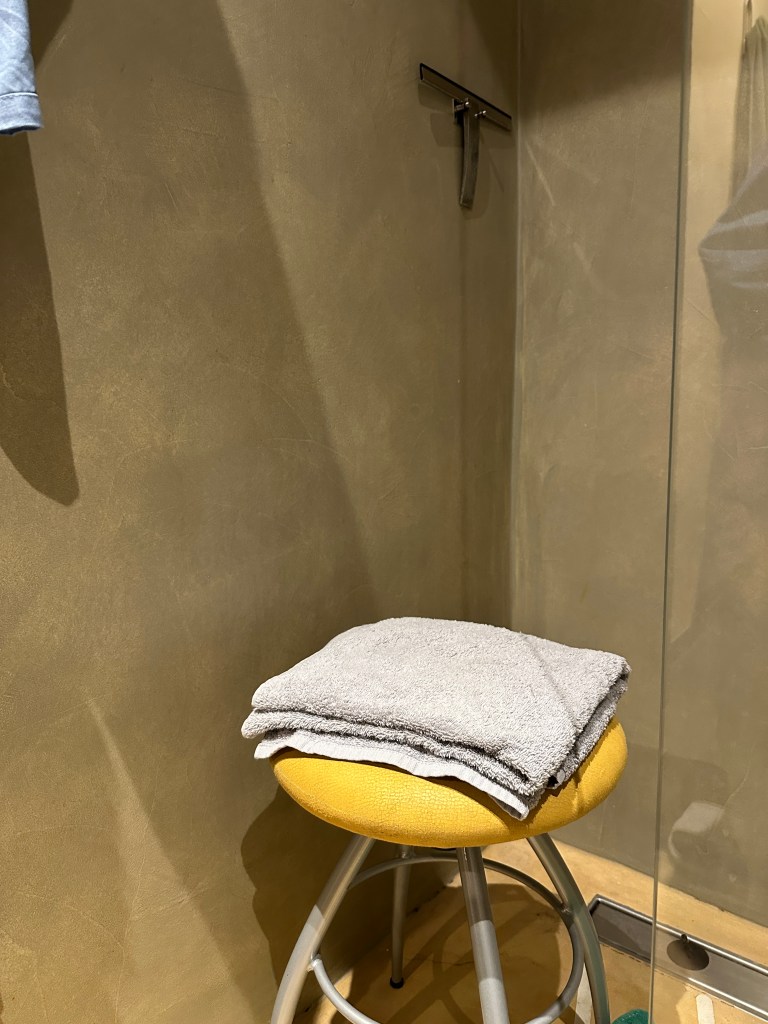
Anyway! Bathing prep will take a fair amount of time, especially if your shower is too small to accommodate the following full time. For me, the necessary items were two water proof chairs or stools and lots and LOTS of towels. Even with my husband’s help it takes about 10min since I don’t keep all this in place permanently and our apartment is too small to keep everything together. It took us 20min to gather everything the first time, since we didn’t know what would help most.
If you don’t have water proof chairs or stools, you can use (clean!!) plastic tarps or large, sturdy plastic bags. In order to avoid slipping (especially if using stools), make sure to cover the relevant areas with a towel – preferably hand towels since you’ll have lots of wet towels to deal with. One chair/stool is for sitting and one is for setting your leg on for comfort and to avoid wetting the incision. Some people buy those silicone bags that cover the entire affected area.
I was skeptical about the waterproofness, so I used leg elevation and covered my bandaged incision area with two thick towels. I put one (folded for max absorption) directly on the surgery area and then, slightly higher, another folded towel on top of the first. This second layer will definitely get wet, but it should absorb the water without getting the first layer wet.
Make your life easier
Keeping the floor as dry as possible will ensure maximum crutch safety. So you will also need plenty of floor towels, especially if you have an open shower glass or a leaky curtain. I have a ⅔ glass so I splash the ground a lot. I put down at least two layers of towels that way when I get out and remove them, the floor is mostly dry. Bathroom floors tend to be ridiculously slippery as it is. Towels will also help with splashing when using a bidet, which I mentioned above.
Lastly, I keep all my post shower items in my bedroom since getting away from the slippery floor is top priority. Body lotion, skincare, hair products, etc. The cart that I mention next comes in handy for keeping things organized.
COMFORT For a better limited-mobility experience at home, using a shelved cart is immensely useful to move stuff in one go. Bonus points if it has a built-in basket. Additionally, organizational boxes further help since keeping items grouped makes everything less cluttered. Think hygiene items, first aid items (wound care), books, electronics, clothing, water bottle/pitcher etc.
If you don’t have a cart or can’t get one for whatever reason, I used only a tray at first. Water bottles, ice packs, food/drink, computers, books, etcetera. Pile items on there, put it on the floor and gently kick it from A to B or set it from surface to surface, if that’s an option for you. A packing cube with a handle is also great since you can still carry it even with crutches. An alternative would be a tote which you can shoulder carry, though less comfy and slows you down due its to swinging around.
The trays and totes/packing cubes are still useful even with the cart since you don’t always need everything on there at once, especially if you want to move something as a one off. You’ll still keep items organized and also help them stay put while rolling the thing around.

Cart, tray, packing cube, etc.
The next item will be unimaginable for some. Heavy absorption adult diapers, teehee! I only used them for the first few days, only to pee, and strictly at night. They came in especially handy during those first post-op days when pain is most intense and mobility most compromised. If your bathroom is far away from your bed, they are most helpful, since waking up during the night makes for quite the wobbly (read: dangerous) walk. The heavy absorption is key if you are drinking as much water as you should be for optimum scar healing.
MISCELLANEOUS For optimum crutch comfort, invest in gel grips, elbow support, and wrist support (as previously mentioned). There is also a special clip that attaches one crutch to the other. This is the ONLY thing I’ll be linking because a lot of people don’t think to even search for something like this. It is sooo useful! Especially if you have stairs you need to climb. But just in general at home or when you need to go out. It prevents their constant falling over which, for me, was inevitable. #clumsy
Help your future self
As with everything I’ve shared, do your own research for the best of these items. One of my top recommendations is the crutch clip, since attaching them in an X shape allows for more balance going up and down stairs. It also avoids having to constantly pick them up while you do the few things you must while standing. I swear at least one of them fell every time I propped them up to do anything.
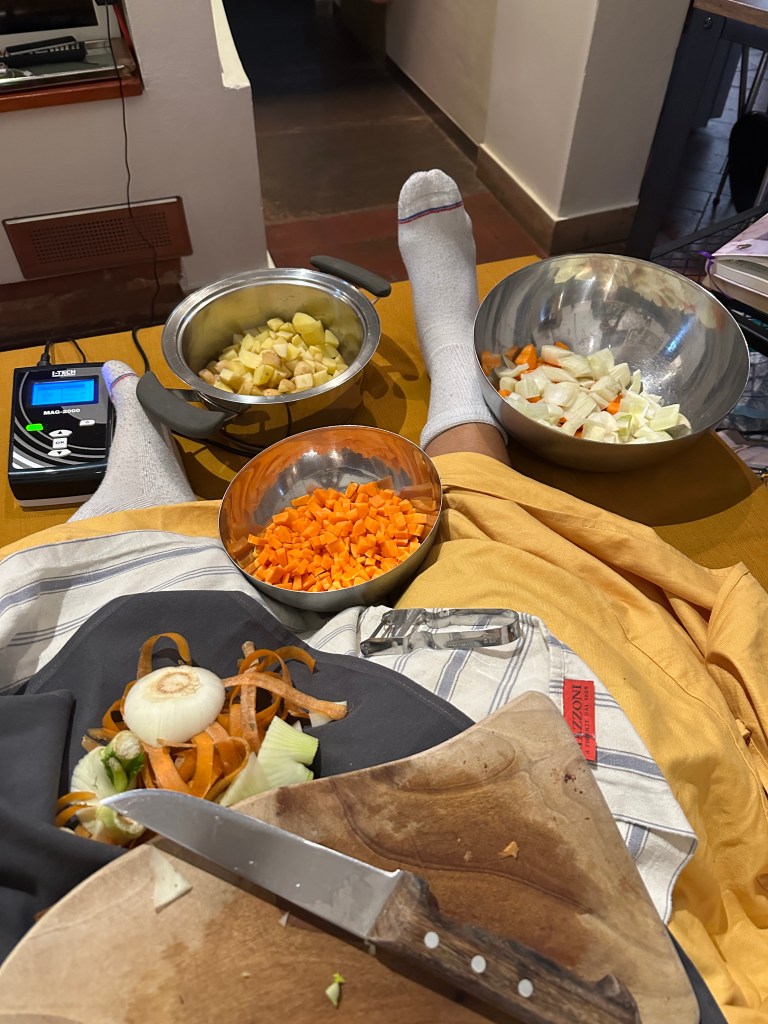
Finally, consider meal prepping prior to the surgery so you don’t have to think about cooking during recuperation. It is supremely helpful. I highly recommend soups since they are easy to chuck in a pot and reheat. My faves were [blended] potato, tomato and mushroom, all frozen without dairy. The toppings make a world of difference in keeping meals interesting. For example, think of the potato soup like a loaded baked potato… butter, cheddar, sour cream, bacon, chives etc.
meal prep is your friend

Leave a comment